
Locksmithing 101| How to Re-key Cam Locks - Everything you need to know!
If you're in the business, you know that many different cam lock manufacturers are out there. There are so many other code series, and it can be pretty challenging at times. That is where the cam lock kit made by ESP comes in. It covers most cam locks that you will encounter and use it to some degree. Let me go over the depth of the kit before we go into the steps on how to rekey your standard cam lock using the cam lock kit.
This kit is by ESP, and the diameter of this will fit a lot of different cam locks. Inside on the wafer numbers, I wrote the different depths, .250 for #1, .230 #2, .210 #3, .190 #4, and .170 for #5. These are the depths that you're going to have to be working within the kit. There are different code series out there, but these cam locks do not adhere to the strictest tolerances, so it will work despite it being inexpensive. So if you are dealing with a .180, you could use one of these .170. It will seal the job.
As you can see, there are about 75-ish wafers in each for each size here, and if you look at the springs, there's at least a couple of 100, maybe even much more. So this is the kit, I'll put a link below, so if you're not familiar with this, you can look at it.

The cam looks like this. The ones that are rekeyable will have like a Philips or a flathead screw in the back, and if you find ones that have a rivet on the back, those weren't meant to be rekeyed.
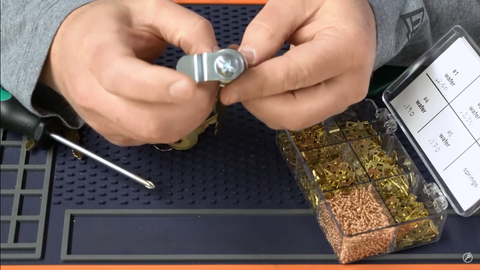
To get it apart, all you do is just put your Philips screwdriver in here and unscrew it.

When you do that, you're going to get all the minor parts and pieces that will come off, and this is just going to come right out.

Once you get it out, this is what you're going to be looking at; this one has five wafers right here.

And on the backside of it, you're just going to see a little slot.

There's a spring in each chamber here, and then the wafer goes on top, and when you push it in, it locks in there.

So when you go to get the wafers out, sometimes you can use a thin screwdriver like this, go to the backside, get in here, and start pushing down.

You can get in there and get it going, but despite pushing hard and you can't get it out. That's because they can kind of get stuck in there quite a bit. And to get it open, you can use this tool, the Gator tools' wafer popper. It looks like an automotive tool many times, but it works acceptable and perfectly with little cam locks.

So let's get all these wafers out. Start on the backside of the wafer, clamp the wafer popper and apply force. Essentially, we are forcing it out.
Do the same steps and proceed to the other wafers.
Tip: If you end up getting a new key that you're going to pin and wafers are quite a bit off, something you can do is come up with your combination. For whatever reason, you can swap some of the wafers around. You want to make sure you're switching out ones for fives or fours or something to ensure it's still secure, but that is an option if you find yourself without a kit, or the kits will not work.

And once we got this empty, we're now ready to pin up the cam lock.

In this example, I am going to use a key with code IN137. I went to generic code, and I printed out the cuts for it.
Note: We do make space and depth keys that go over the code series that work with the cam lock. The code series has a bunch more than the five different sizes in the cam lock kit. It also has a W, X, and a six and a seven. The W and the X are splits between one and two and two and three. So, you should pull it up, take a look at it, but if you find yourself without a code program to do something like that, you can use space and depth keys like this.

Consider the CUTS DETAILS when pinning up a cam lock. In this case, we need to pin wafer number 2. To do that, get a spring here and put it in. Next will be the number two wafer; put it in and push it in using a screwdriver. And once you do that, it's going to lock into place.

Repeat this process when pinning a cam lock, but make sure to get the correct wafer number by consulting your CUTSDETAILS. In this case, I've dealt with wafer numbers 2, 4, 2, 1, and 4.

Once we've pinned this up, we can go in and take our key. And as you can see, they all look great except for one, which is not the proper depth. That is at space no. 4 that uses wafer no. 1. It's sticking up like that, and you can't push it in. This is probably the used kit that was used, so there might have been a wafer mix-up. We need to change that wafer by doing the same step.

And there we go. It's perfect. See, it's nice and flush. It's nice and even, and there isn't an issue here.

We have two number 2 depths. That's right in the middle, like the three and the four and one and the two as far as the W and the X cuts go. So I'm going to go in and take an X key, so this is between the two and the three, and when you look at it here on these number two depths, they're perfectly flush or works just fine. I just want to go back to the fact that if you find a code with a W or X just about to use, this kit will work for it.

And there you have it. That's how you pin up a cam lock using the ESP wafer kit. I'll put links below to all this stuff. I appreciate you guys, and I'm glad that we had a few little hiccups here because you can see more of a real-world situation. So thank you, guys, and we'll see you next time.