Locksmithing 101 | How To Install A Vats Bypass Module! Bye, Bye VATS Key
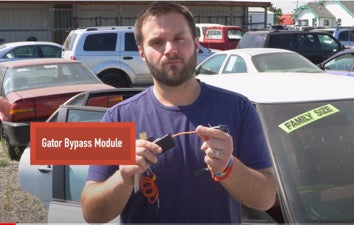
Hey this is PJ with CLK supplies. Today we are working on a 1997 Buick LeSabre. This car is equipped with VATS Keys which are outdated. Because of its age, something typically breaks in the ignition, and although the key turns, it won’t start the vehicle.
Today, we are going to install the bypass module. The first step is to crawl into the vehicle from the inside, under the steering column. From here locate the ignition wire.
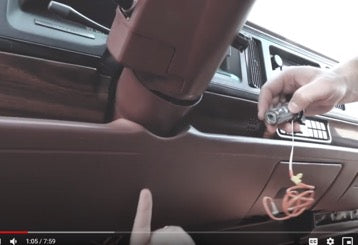
Place the ignition in its appropriate space and thread the ignition wire through the steering column. Once the ignition wire is visible below, you will make your connection.
There are two types of connections:
Standard
42 Pin Connector
For this exercise, we’ll be using the 42 Pin Connector while hooking up the bypass module as I will walk you through every step of the way.
Step 1:
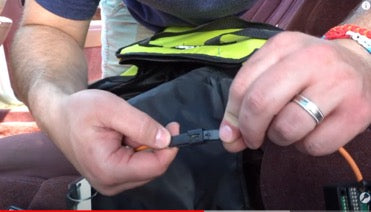
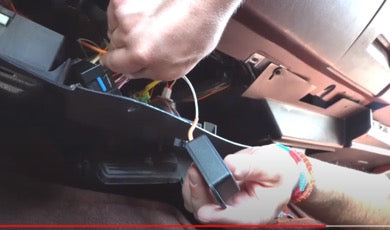
As we discussed earlier. Thread the ignition wire through the steering column under your dashboard. Once you remove the electrical plate under the dash, you should be able to locate the orange ignition wire shown here…
Step 2:
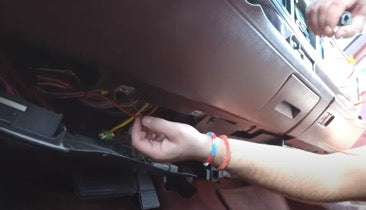
Once you have located the wire harness, you will see a red, 7mm screw in place. Remove the screw to release the harness. There, you will see the two VATS wire plug-in, shown below.
Step 3:
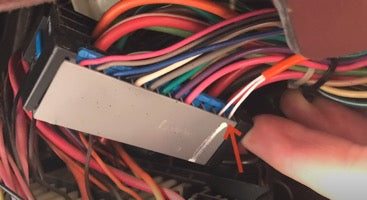
To take the harness apart, the 42 pin Extension Plug will come with installation instructions which I highly recommend using. For now, I will continue to walk you through the process.
Once you have removed the 7mm bolt and the harness is disconnected, follow the step-by-step instructions provided by the Extension Plug for connection.
Step 4:
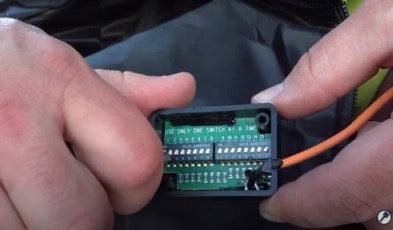
Once the 42-pin extension plug is connected, you will want to connect the bypass module shown here…
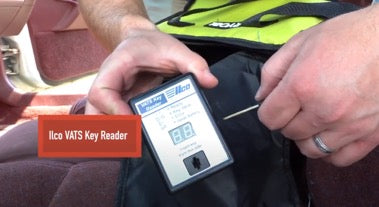
IMPORTANT - Before connecting the module, you have to set the VATS key number here.
Take the existing car key and use the VATS Key Reader to display the key number shown here.
Once the number is displayed, read the numbers 1-15, located on the bypass module.
The numbers in the down position are off. Locate the number displayed on the VATS Key Reader and turn it to the “on” position with the key. The VATS number is now set.
Step 5:
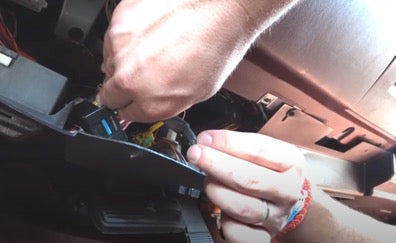
Place the cover and screws back on the bypass module and connect it back to the wire harness. Place the 7mm screw back into the wire harness.
The Bypass Modulator comes with a few zip ties, which can be used to secure it in place under the dashboard.
Once the wire harness and modulator are in place, close and set the plastic underplate of the dashboard.
You now have a normal key cylinder for your vehicle.
Both the VATS Key or a regular cut, B-62 key (shown below) will work with this ignition.
Here are some additional links to learn more or purchase any of the items mentioned in this video.
Don’t forget to like and subscribe to our channel where we upload new tutorials on locksmithing every month.
Article by PJ Slauson
In 2004, PJ Slauson (then only 19 years old) was working as a locksmith for his dad’s locksmith company and going to college. His dad had a little DBA side business selling locksmith supplies to locals. He had a few shelves in the back of his key shop with some keychains and padlocks which PJ started selling online to make a little extra money.He quickly sold out, eventually PJ decided to setup his own website, and clksupplies.com took off immediately.